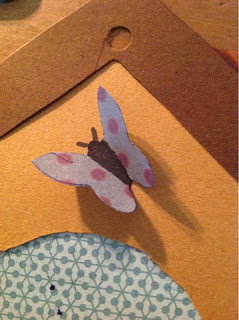
Thought I would post a quick little post to share my new creation. I tried to think of something cute and different to use as gifts tags for a gift for my mother-in-law. I found inspiration from a stencil a had laying around and the bird house gift tags were born!
What I used:
- brown card stock
- patterned scrapbook paper in two colours
- pen
- scissors
- permanent maker
- roll on scrapbook tape
I first picked a set of coordinating scrapbook paper and paired them with a combination of two colours of brown card stock.
I traced the house part with he hole onto one piece of brown and the roof on the other brown colour. Then I traced the back piece on one of the patterned papers and the butterfly on the other.
I cut all the pieces out. I used a hole punch to start the opening of the main house piece so I could easily get in there with the scissors to cut the circle.
 |
| Individual Cut Pieces |
 |
| Butterfly Piece Folded from Bottom Middle to Top Left Side of Body |
 |
| Finished Butterfly |
I then attached the pieces together. I first attached the back piece by rolling tape onto the back corners of the house piece. Then the roof by taking the middle peace and the side about one inch in from the edges. Before I attached the butterfly I bent the wings from the middle of the bottom to the top corner on either side of the middle section. I then attached the butterfly by just the middle section. I used a marker to fill in the body of the butterfly and add antenna.
And those are my cute brid house gift tag creations! The hole in the centre is where I wrote my "to" and "from" information. So I do recomend to use a subtle tone on tone patterned paper in order to see your writting.
 |
| Finished Product |


No comments:
Post a Comment